最近折腾Mac分区在Win下读取
一不小心就把整个盘抹掉了,也是伤心
可怜我这么多天的心血、资源
没办法从头再来一次吧,这次记录一下iterm2的折腾过程,以备以后查看
最终效果
可以自定义一张背景图片,这里我就没设置了
实现过程
1、下载iTerm2
官网下载:https://www.iterm2.com/
安装完成后,在/bin目录下会多出一个zsh的文件。
Mac系统默认使用dash作为终端,可以使用命令修改默认使用zsh:
chsh -s /bin/zsh
iterm2的原始界面

2、替换背景图片
打开路径:iterm2 -> Preferences -> Profiles -> window -> Background Image
选择一张自己喜欢的壁纸即可
可以通过Blending调节壁纸的透明度: 透明度为0的时候,背景变为纯色(黑色)
个人不喜欢这里就不在替换了
3、安装Oh my zsh(环境问题可能会需要先进行步骤4)
zsh的功能极其强大,只是配置过于复杂,通过Oh my zsh可以很快配置zsh。
安装方法有两种,可以使用curl或wget,看自己环境或喜好:
# curl 安装方式
sh -c "$(curl -fsSL https://raw.githubusercontent.com/ohmyzsh/ohmyzsh/master/tools/install.sh)"
# wget 安装方式
sh -c "$(wget -O- https://raw.githubusercontent.com/ohmyzsh/ohmyzsh/master/tools/install.sh)"
4、安装PowerLine
首先先安装pip命令:
sudo easy_install pip
安装powerline:
pip install powerline-status --user
5、安装PowerFonts
在常用的位置新建一个文件夹,如:~/Desktop/OpenSource/
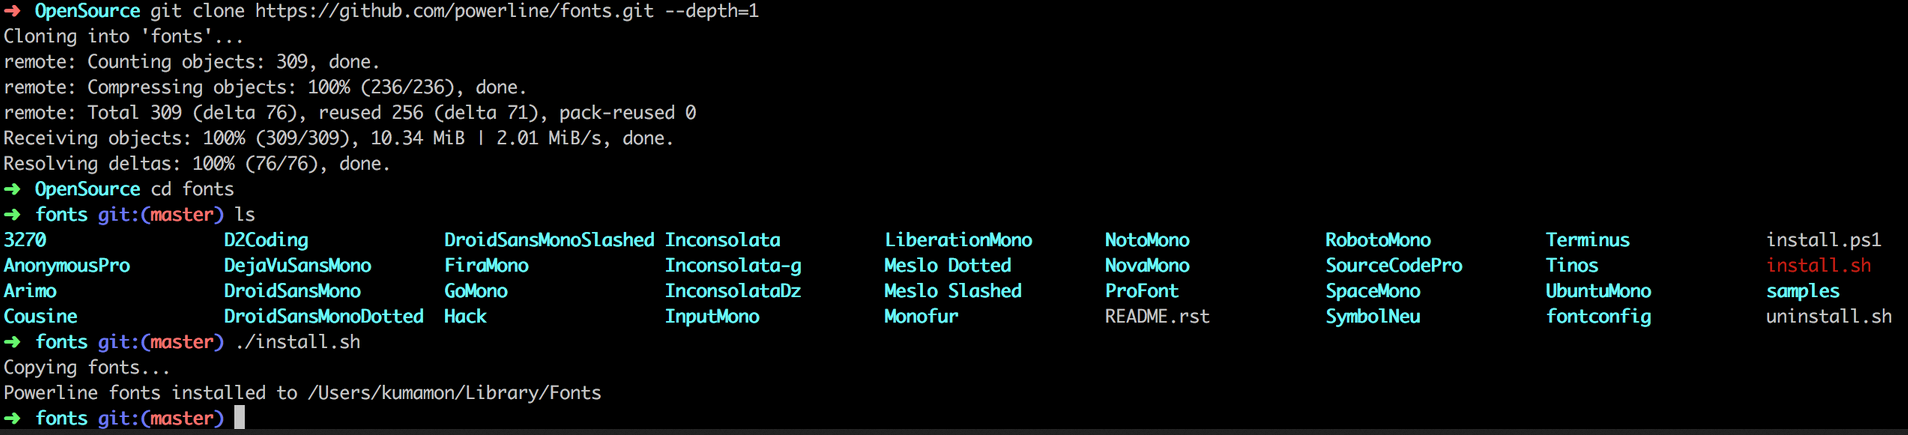
在OpenSource文件夹下下载PorweFonts:
# git clone
git clone https://github.com/powerline/fonts.git --depth=1

# cd to folder
cd fonts

# run install shell
./install.sh
执行结果如下:
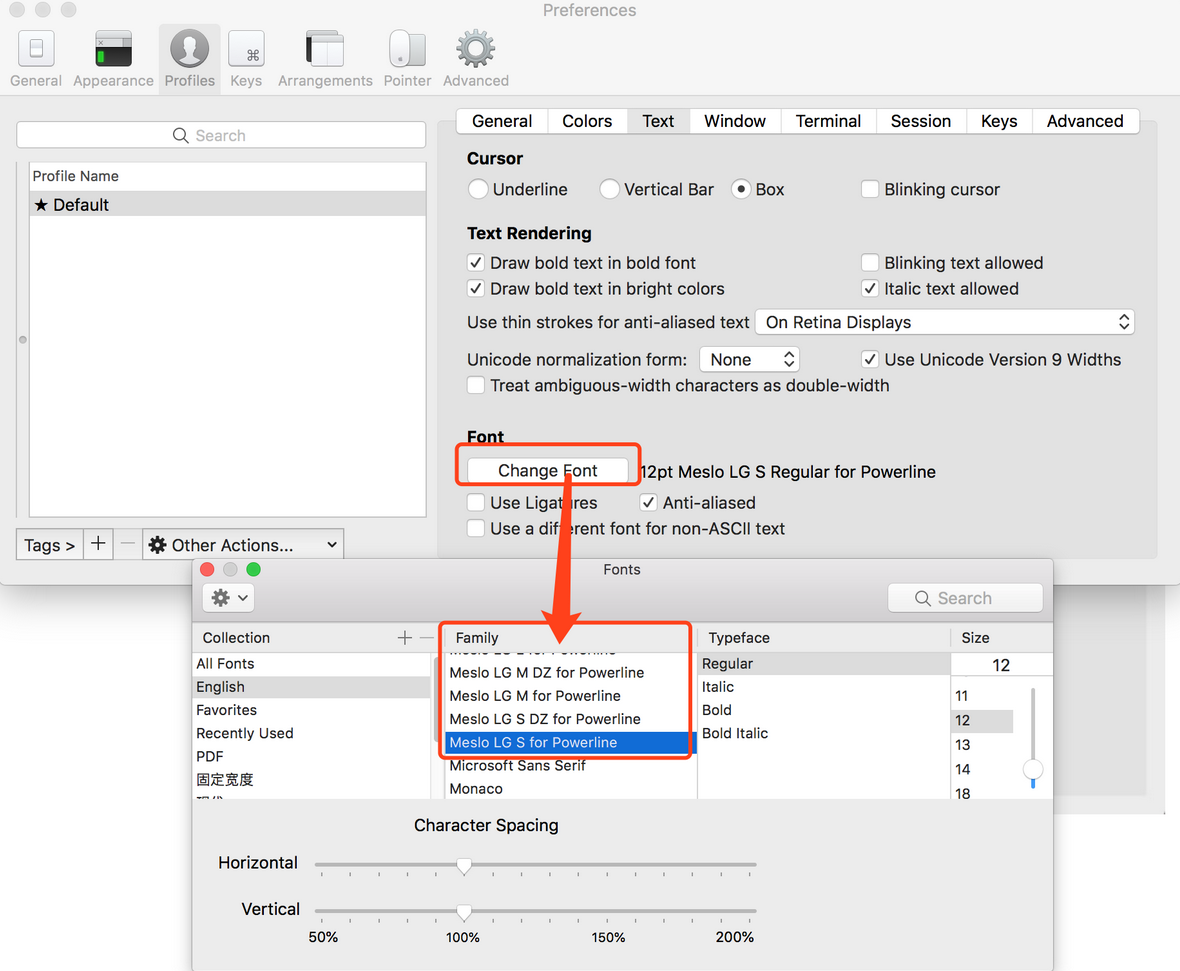
安装好字体库之后,我们来设置iTerm2的字体,具体的操作是:
iTerm2 -> Preferences -> Profiles -> Text
在Font区域选中Change Font,然后找到Meslo LG字体。
6、安装配色方案(可跳过)
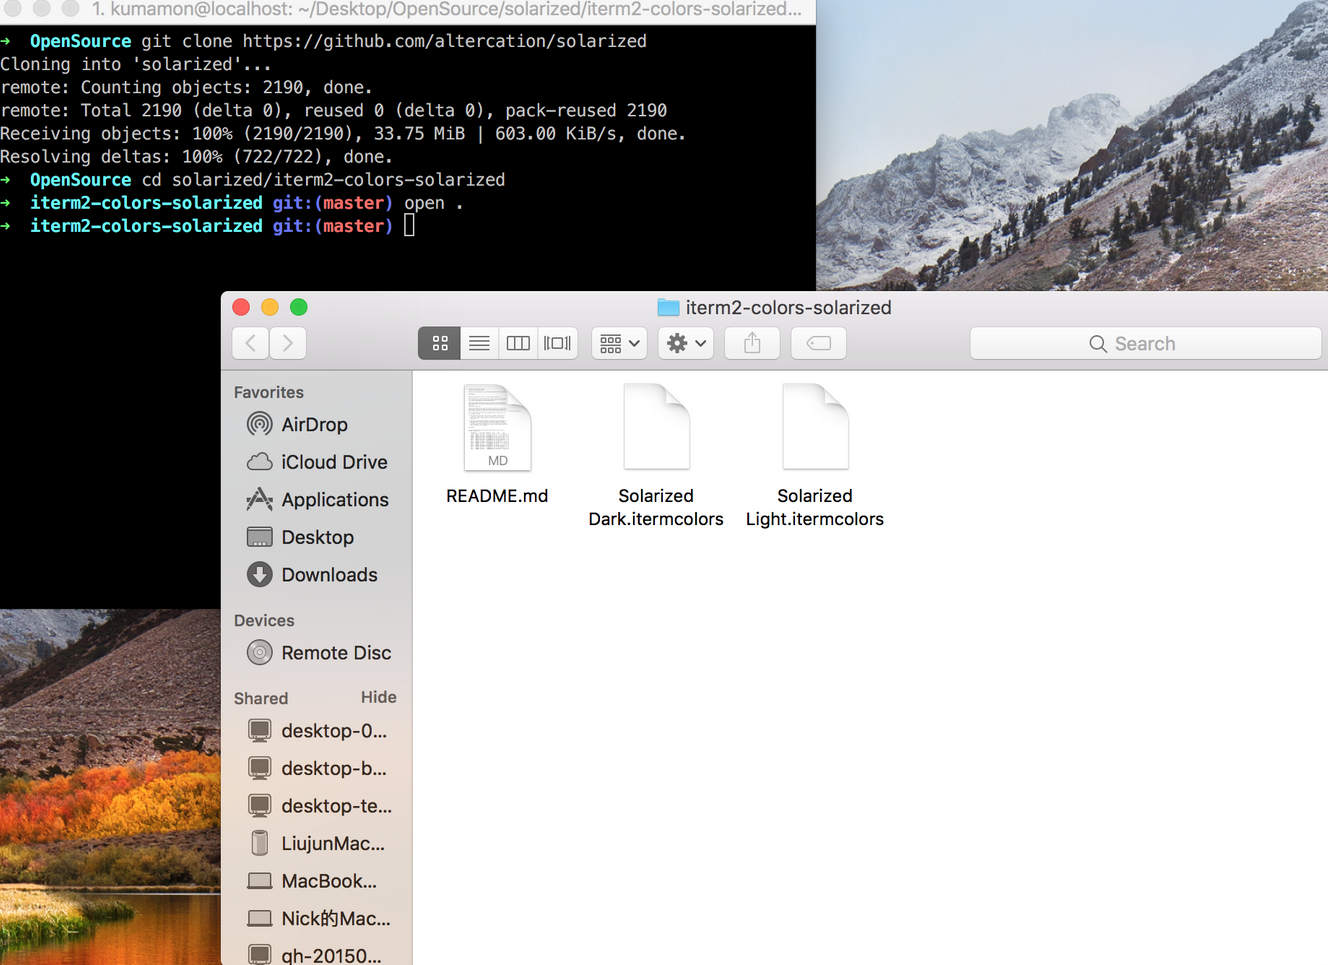
在OpenSource目录下执行git clone命令:
git clone https://github.com/altercation/solarized

cd solarized/iterm2-colors-solarized/
open .
在打开的finder窗口中,双击Solarized Dark.itermcolors和Solarized Light.itermcolors即可安装明暗两种配色:
再次进入iTerm2 -> Preferences -> Profiles -> Colors -> Color Presets中根据个人喜好选择.
7、安装主题
在OpenSource目录下执行git clone命令:
git clone https://github.com/fcamblor/oh-my-zsh-agnoster-fcamblor.git

cd oh-my-zsh-agnoster-fcamblor/
./install
执行上面的命令会将主题拷贝到oh my zsh的themes.
执行命令打开zshrc配置文件,将ZSH_THEME后面的字段改为agnoster
vi ~/.zshrc
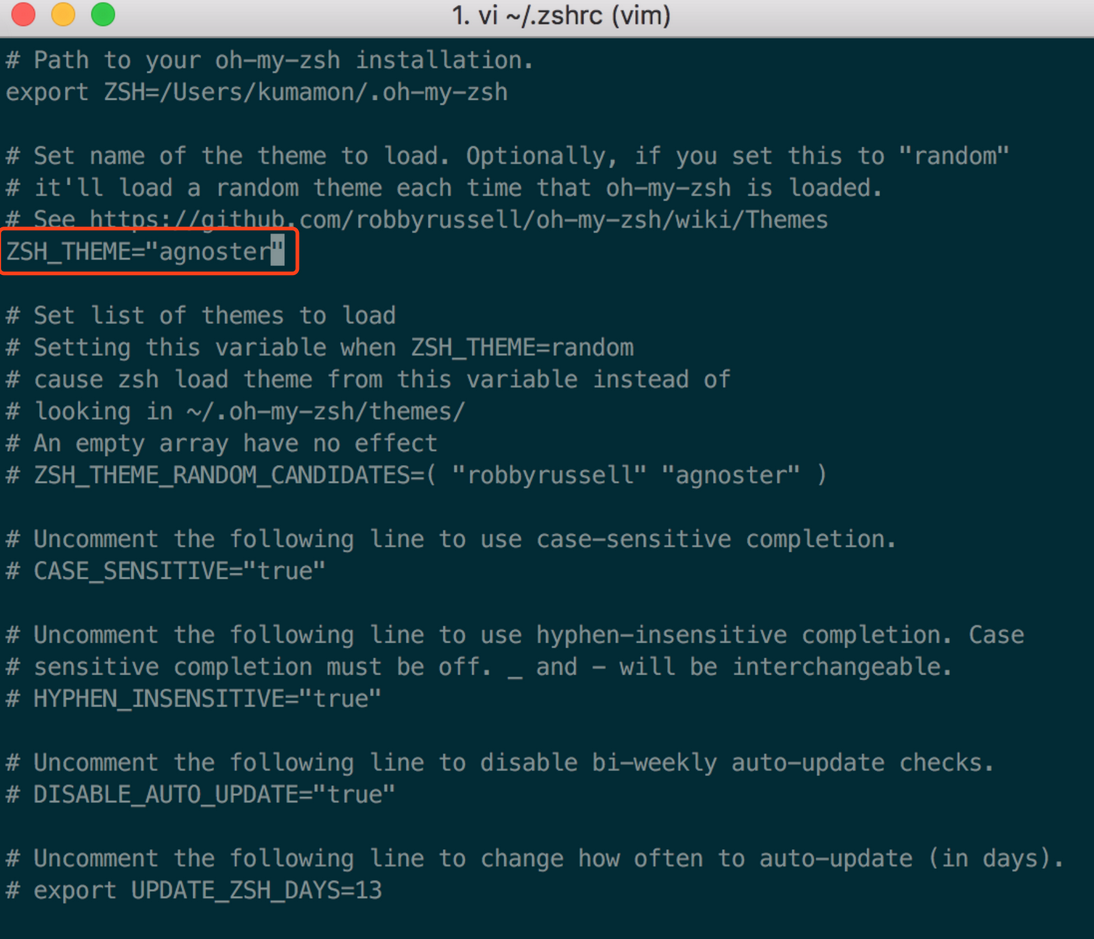
我这里简单说一下vim的一些操作命令,不熟悉的可以看看:
键盘i: 进入可编辑模式,最下面显示-- INSERT --
键盘esc: 退出编辑模式
shift + : : 执行命令操作
输入wq: 保存当前更改。如果仅仅退出不保存,可以输入q
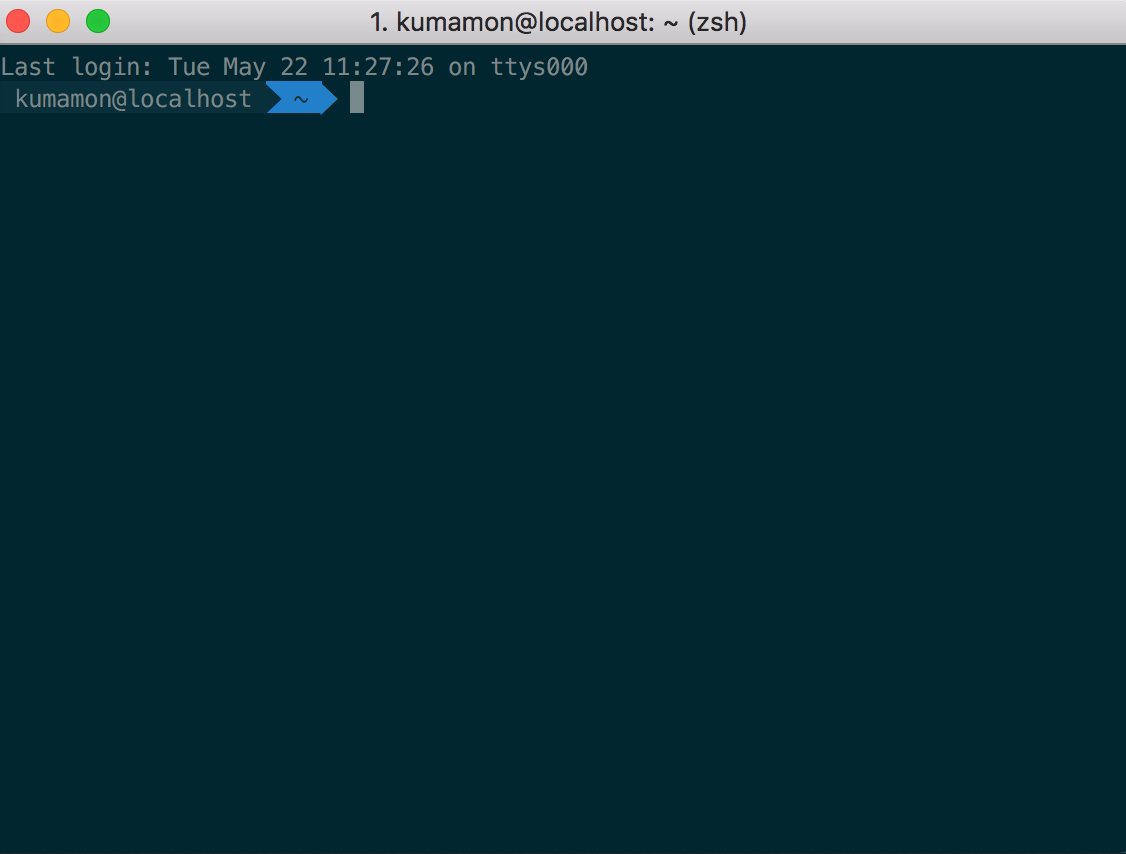
此时command+Q或source配置文件后,iTerm2变了模样:
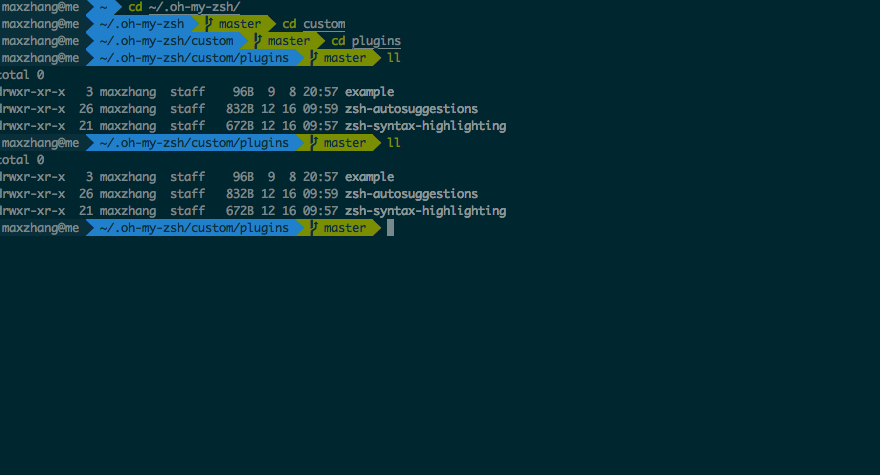
8、安装高亮插件
这是oh my zsh的一个插件,安装方式与theme大同小异:
cd ~/.oh-my-zsh/custom/plugins/

git clone https://github.com/zsh-users/zsh-syntax-highlighting.git
vi ~/.zshrc
这时我们再次打开zshrc文件进行编辑。找到plugins,此时plugins中应该已经有了git,我们需要把高亮插件也加上:
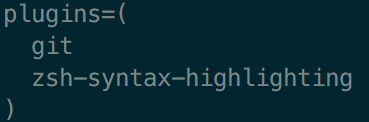
请务必保证插件顺序,zsh-syntax-highlighting必须在最后一个。
然后在文件的最后一行添加:
source ~/.oh-my-zsh/custom/plugins/zsh-syntax-highlighting/zsh-syntax-highlighting.zsh
按一下esc调出vi命令,输入:wq保存并退出vi模式。
执行命令使刚才的修改生效:
source ~/.zshrc
所有配置至此结束。下面提供另外的可选择功能
9、可选择、命令补全
跟代码高亮的安装方式一样,这也是一个zsh的插件,叫做zsh-autosuggestion,用于命令建议和补全。
cd ~/.oh-my-zsh/custom/plugins/

git clone https://github.com/zsh-users/zsh-autosuggestions
vi ~/.zshrc
找到plugins,加上这个插件即可:

插件效果:
有同学说补全命令的字体不太清晰,与背景颜色太过相近,其实可以自己调整一下字体颜色。
Preferences -> Profiles -> Colors 中有Foreground是标准字体颜色,ANSI Colors中Bright的第一个是补全的字体颜色。
